> ## Documentation Index
> Fetch the complete documentation index at: https://mintlify-docs-automation-github-pr-review.mintlify.site/llms.txt
> Use this file to discover all available pages before exploring further.

# 使用 AI 助手

> 通过键盘快捷键、选中文本、代码块、文件附件或 URL 参数打开 AI 助手。在本地预览中测试 AI 助手的行为。

用户有多种方式与 AI 助手开始对话。每种方式都会在文档右侧打开一个聊天面板。用户可以提出任何问题，AI 助手会在你的文档中搜索答案。如果 AI 助手无法检索到相关信息，它会回复无法回答该问题。

<div id="use-the-assistant-in-local-preview">
  ## 在本地预览中使用 AI 助手
</div>

当你使用 CLI 登录后，AI 助手会在本地预览中可用。这让你可以在本地开发文档时测试 AI 助手的行为、`Assistant.md` 中的自定义指令和响应。

1. 如果还没有安装，请使用 `npm i -g mint` 安装 CLI。
2. 运行 `mint login` 进行身份验证。
3. 运行 `mint dev` 启动本地预览。

本地预览中的 AI 助手使用与你部署的文档站点相同的索引内容。

<div id="ui-placement">
  ## 界面位置
</div>

AI 助手出现在两个位置：搜索栏旁边的按钮和页面底部的横栏。

<Columns cols={2}>
  <Frame caption="搜索栏旁的 AI 助手按钮。">
    <img
      src="https://mintcdn.com/mintlify-docs-automation-github-pr-review/rWRx8_B8QDywypwF/images/assistant/assistant-button-light.png?fit=max&auto=format&n=rWRx8_B8QDywypwF&q=85&s=1f86975867ce138ed5ecde480e2b5d36"
      className="block dark:hidden"
      style={{
width: '268px',
height: 'auto',
}}
      alt="浅色模式下的搜索栏和 AI 助手按钮。"
      width="1806"
      height="322"
      data-path="images/assistant/assistant-button-light.png"
    />

    <img
      src="https://mintcdn.com/mintlify-docs-automation-github-pr-review/rWRx8_B8QDywypwF/images/assistant/assistant-button-dark.png?fit=max&auto=format&n=rWRx8_B8QDywypwF&q=85&s=2bec7291f51f3545f069f1ef78de40b1"
      className="hidden dark:block"
      style={{
width: '268px',
height: 'auto',
}}
      alt="深色模式下的搜索栏和 AI 助手按钮。"
      width="1806"
      height="324"
      data-path="images/assistant/assistant-button-dark.png"
    />
  </Frame>

  <Frame caption="页面底部的 AI 助手按钮。">
    <img
      src="https://mintcdn.com/mintlify-docs-automation-github-pr-review/rWRx8_B8QDywypwF/images/assistant/assistant-bar-light.png?fit=max&auto=format&n=rWRx8_B8QDywypwF&q=85&s=5f22340da73dc2f1551295e1800ea6c0"
      className="block dark:hidden"
      style={{
width: '268px',
height: 'auto',
}}
      alt="浅色模式下的 AI 助手横栏。"
      width="656"
      height="112"
      data-path="images/assistant/assistant-bar-light.png"
    />

    <img
      src="https://mintcdn.com/mintlify-docs-automation-github-pr-review/rWRx8_B8QDywypwF/images/assistant/assistant-bar-dark.png?fit=max&auto=format&n=rWRx8_B8QDywypwF&q=85&s=1417db919e5b35ecbf48e62919eb9c1a"
      className="hidden dark:block"
      style={{
width: '268px',
height: 'auto',
}}
      alt="深色模式下的 AI 助手横栏。"
      width="656"
      height="112"
      data-path="images/assistant/assistant-bar-dark.png"
    />
  </Frame>
</Columns>

<div id="keyboard-shortcut">
  ## 键盘快捷键
</div>

使用键盘快捷键打开 AI 助手聊天面板：macOS 上使用 <kbd>Command</kbd> + <kbd>I</kbd>，Windows 上使用 <kbd>Ctrl</kbd> + <kbd>I</kbd>。

<div id="url-parameters">
  ## URL 参数
</div>

通过在 URL 上添加 `?assistant` 查询参数，从文档站点的任意页面打开 AI 助手。可用于从外部内容（如邮件、支持回复、应用内横幅或新手引导流程）深度链接到 AI 助手。

* `?assistant`：打开 AI 助手聊天面板，但不发送任何消息。
* `?assistant=<消息>`：打开 AI 助手聊天面板，并将 `<消息>` 作为用户的第一条消息发送。请对参数值进行 URL 编码，以确保空格和特殊字符在请求中被正确保留。

```text 示例 theme={null}
https://yourdocs.mintlify.site/quickstart?assistant
https://yourdocs.mintlify.site/quickstart?assistant=How%20do%20I%20get%20started%3F
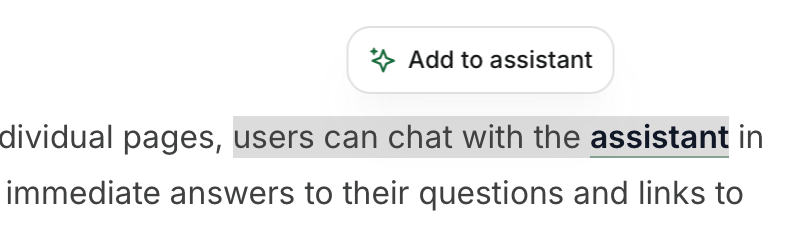
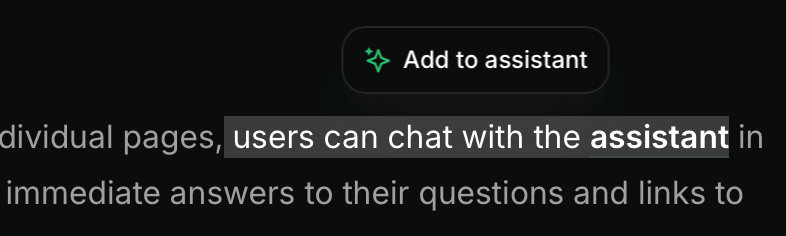
```

<div id="highlight-text">
  ## 选中文本
</div>

在页面上选中文本，然后点击弹出的 **Add to assistant** 按钮，即可打开 AI 助手聊天面板并将选中的文本添加为上下文。你可以向 AI 助手的上下文中添加多个文本片段或代码块。
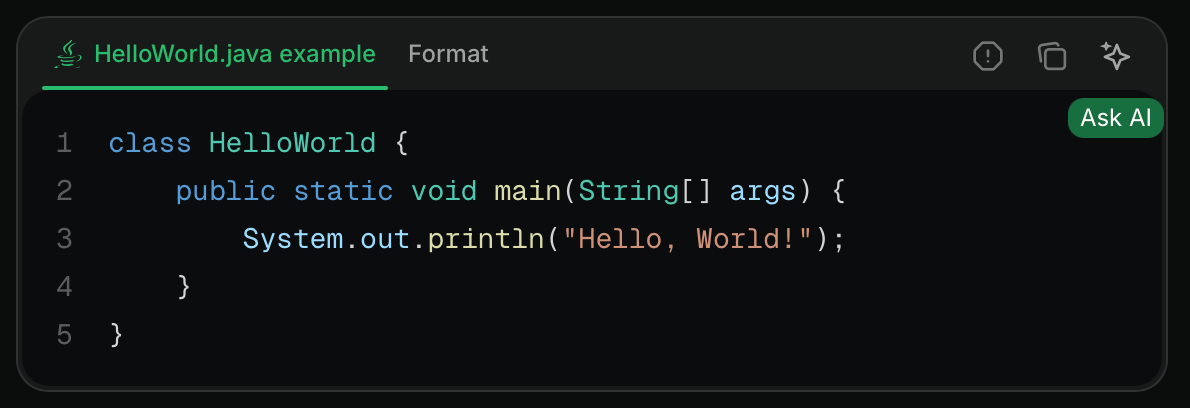
<Frame>
  <img src="https://mintcdn.com/mintlify-docs-automation-github-pr-review/rWRx8_B8QDywypwF/images/assistant/highlight-light.png?fit=max&auto=format&n=rWRx8_B8QDywypwF&q=85&s=db9a69ed8cb4837170ab82b2410b9df4" alt="浅色模式下选中文本上方的 Add to assistant 按钮。" className="block dark:hidden" width="786" height="236" data-path="images/assistant/highlight-light.png" />

  <img src="https://mintcdn.com/mintlify-docs-automation-github-pr-review/rWRx8_B8QDywypwF/images/assistant/highlight-dark.png?fit=max&auto=format&n=rWRx8_B8QDywypwF&q=85&s=d5671c2203b2611df2b35481e950c15f" alt="深色模式下选中文本上方的 Add to assistant 按钮。" className="hidden dark:block" width="786" height="236" data-path="images/assistant/highlight-dark.png" />
</Frame>

<div id="code-blocks">
  ## 代码块
</div>

点击代码块中的 **询问助手** 按钮，打开 AI 助手聊天面板并将代码块添加为上下文。你可以向 AI 助手的上下文中添加多个代码块或文本片段。
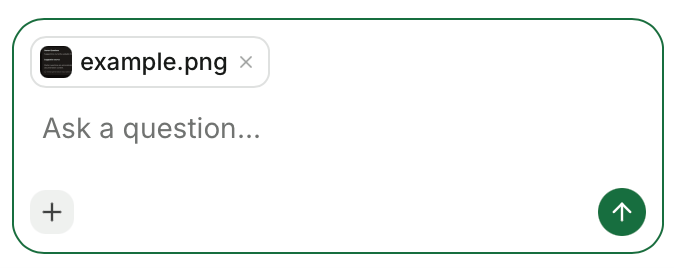
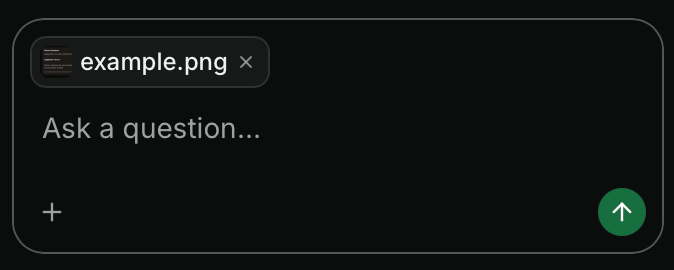
<Frame>
  <img src="https://mintcdn.com/mintlify-docs-automation-github-pr-review/rWRx8_B8QDywypwF/images/assistant/code-block-light.png?fit=max&auto=format&n=rWRx8_B8QDywypwF&q=85&s=ba42f8e0a202d7add871dc2d8254e7d1" alt="浅色模式下代码块中的“询问助手”按钮。" className="block dark:hidden" width="1190" height="408" data-path="images/assistant/code-block-light.png" />

  <img src="https://mintcdn.com/mintlify-docs-automation-github-pr-review/rWRx8_B8QDywypwF/images/assistant/code-block-dark.png?fit=max&auto=format&n=rWRx8_B8QDywypwF&q=85&s=b344b10cffa56e30b225f66e4dc66d8b" alt="深色模式下代码块中的“询问助手”按钮。" className="hidden dark:block" width="1190" height="408" data-path="images/assistant/code-block-dark.png" />
</Frame>

<div id="file-attachments">
  ## 文件附件
</div>

向 AI 助手消息附加文件以提供额外的上下文。

支持的文件类型：

* **图片**：JPEG、PNG、GIF、WebP、SVG
* **文档**：PDF
* **代码和文本文件**：JavaScript (`.js`、`.jsx`、`.mjs`、`.cjs`)、TypeScript (`.ts`、`.tsx`)、Python、HTML、CSS、Markdown、MDX、JSON、YAML、XML、SQL、CSV、纯文本、Shell 脚本 (`.sh`、`.bash`、`.env`)、GraphQL、TOML、Go、Rust、Ruby、Java、Kotlin、Swift、C (`.c`、`.h`)、C++ (`.cpp`、`.hpp`)、C#、PHP、Lua、R、Scala

限制：

* 最大文件大小：每个附件 5 MB
* 每条消息最大附件数：10

<Frame>
  <img src="https://mintcdn.com/mintlify-docs-automation-github-pr-review/rWRx8_B8QDywypwF/images/assistant/image-attach-light.png?fit=max&auto=format&n=rWRx8_B8QDywypwF&q=85&s=42d0bbbb4ba076153ddebf2759995d35" alt="在 AI 助手聊天面板中添加的图片作为上下文。" className="block dark:hidden" width="674" height="268" data-path="images/assistant/image-attach-light.png" />

  <img src="https://mintcdn.com/mintlify-docs-automation-github-pr-review/rWRx8_B8QDywypwF/images/assistant/image-attach-dark.png?fit=max&auto=format&n=rWRx8_B8QDywypwF&q=85&s=17491c75c6a0cfd8252fc278b1f3f230" alt="在 AI 助手聊天面板中添加的图片作为上下文。" className="hidden dark:block" width="674" height="270" data-path="images/assistant/image-attach-dark.png" />
</Frame>

<div id="troubleshooting">
  ## 故障排除
</div>

<Accordion title="AI 助手聊天栏不可见">
  如果 AI 助手界面在某些浏览器中不可见，你可能需要向 [EasyList](https://easylist.to) 提交误报报告。使用 EasyList Cookies List 的浏览器（如 Brave 和 Comet）有时会屏蔽 AI 助手或其他界面元素。EasyList Cookies List 包含特定域名的规则，用于隐藏某些域名上的固定元素以屏蔽 Cookie 横幅。此规则会无意中影响合法的界面组件。

  向 [EasyList](https://github.com/easylist/easylist) 提交误报报告以请求移除该规则。一旦过滤列表更新，这将为所有用户解决此问题。
</Accordion>
